
Set Design, Lighting, and Cosplay: How to bring Your Fantasy Universe alive & enhance your Worldbuilding
Bringing Eldwyn to Life: Behind the Scenes of a Fantasy Cosplay Shoot
I’ve often said that it’s my dream to bring my own fantasy world and its characters to life. For a long time, I could only imagine this through illustrations — much like when I created my first artbook during my Bachelor of Arts.
What I didn’t know back then: that was only the beginning.
Even today, I feel like I’m just at the start of my journey. But during the shoot on June 12, 2025, I finally realized how much I had already accomplished. In my last blog post, I showed how I hand-sewed Eldwyn’s priest robe — Eldwyn being one of my main characters and the protagonist of my current book project.
For this shoot, I had the incredible opportunity to collaborate with mary_misanthrophe. She not only brought Eldwyn to life and posed her beautifully for the camera, but also helped me create content for another secret Project.
Why Cosplay and LARP Matter for Worldbuilding
Cosplay and LARP have always been my gateway into a reality where dreams feel possible. Characters whose stories deeply resonated with me — giving me inspiration and courage — suddenly became tangible.
That day, standing in front of mary_misanthrophe dressed in the robe I had crafted, I had to pause for a moment. Eldwyn — a character who had only existed in my mind — now stood in flesh and blood before me. Handing her over to mary felt like projecting my imagination into reality.
This blog post takes you behind the scenes of that shoot. I’ll share how I set up the scene, arranged the lighting, and brought it to life — complete with tips, tricks, and a lot of heart.

Setting the Scene: Eldwyn’s Study
For the shoot, I built a new set to represent Eldwyn’s study. Every item was meant to reflect her personality:
Books and scattered papers symbolize her curiosity and thirst for knowledge.
A map of Ananthara represents her longing to explore the world.
The overall chaos hints at her internal conflicts, while the cozy corners reflect her gentle nature.
Honestly, I could describe every single prop and its symbolism, but let’s just say — everything was intentional. I was amazed at how quickly and effectively you can turn everyday objects into a compelling set when you commit to the vision.

Fotografie Studio Set Studierzimmer
About the Character
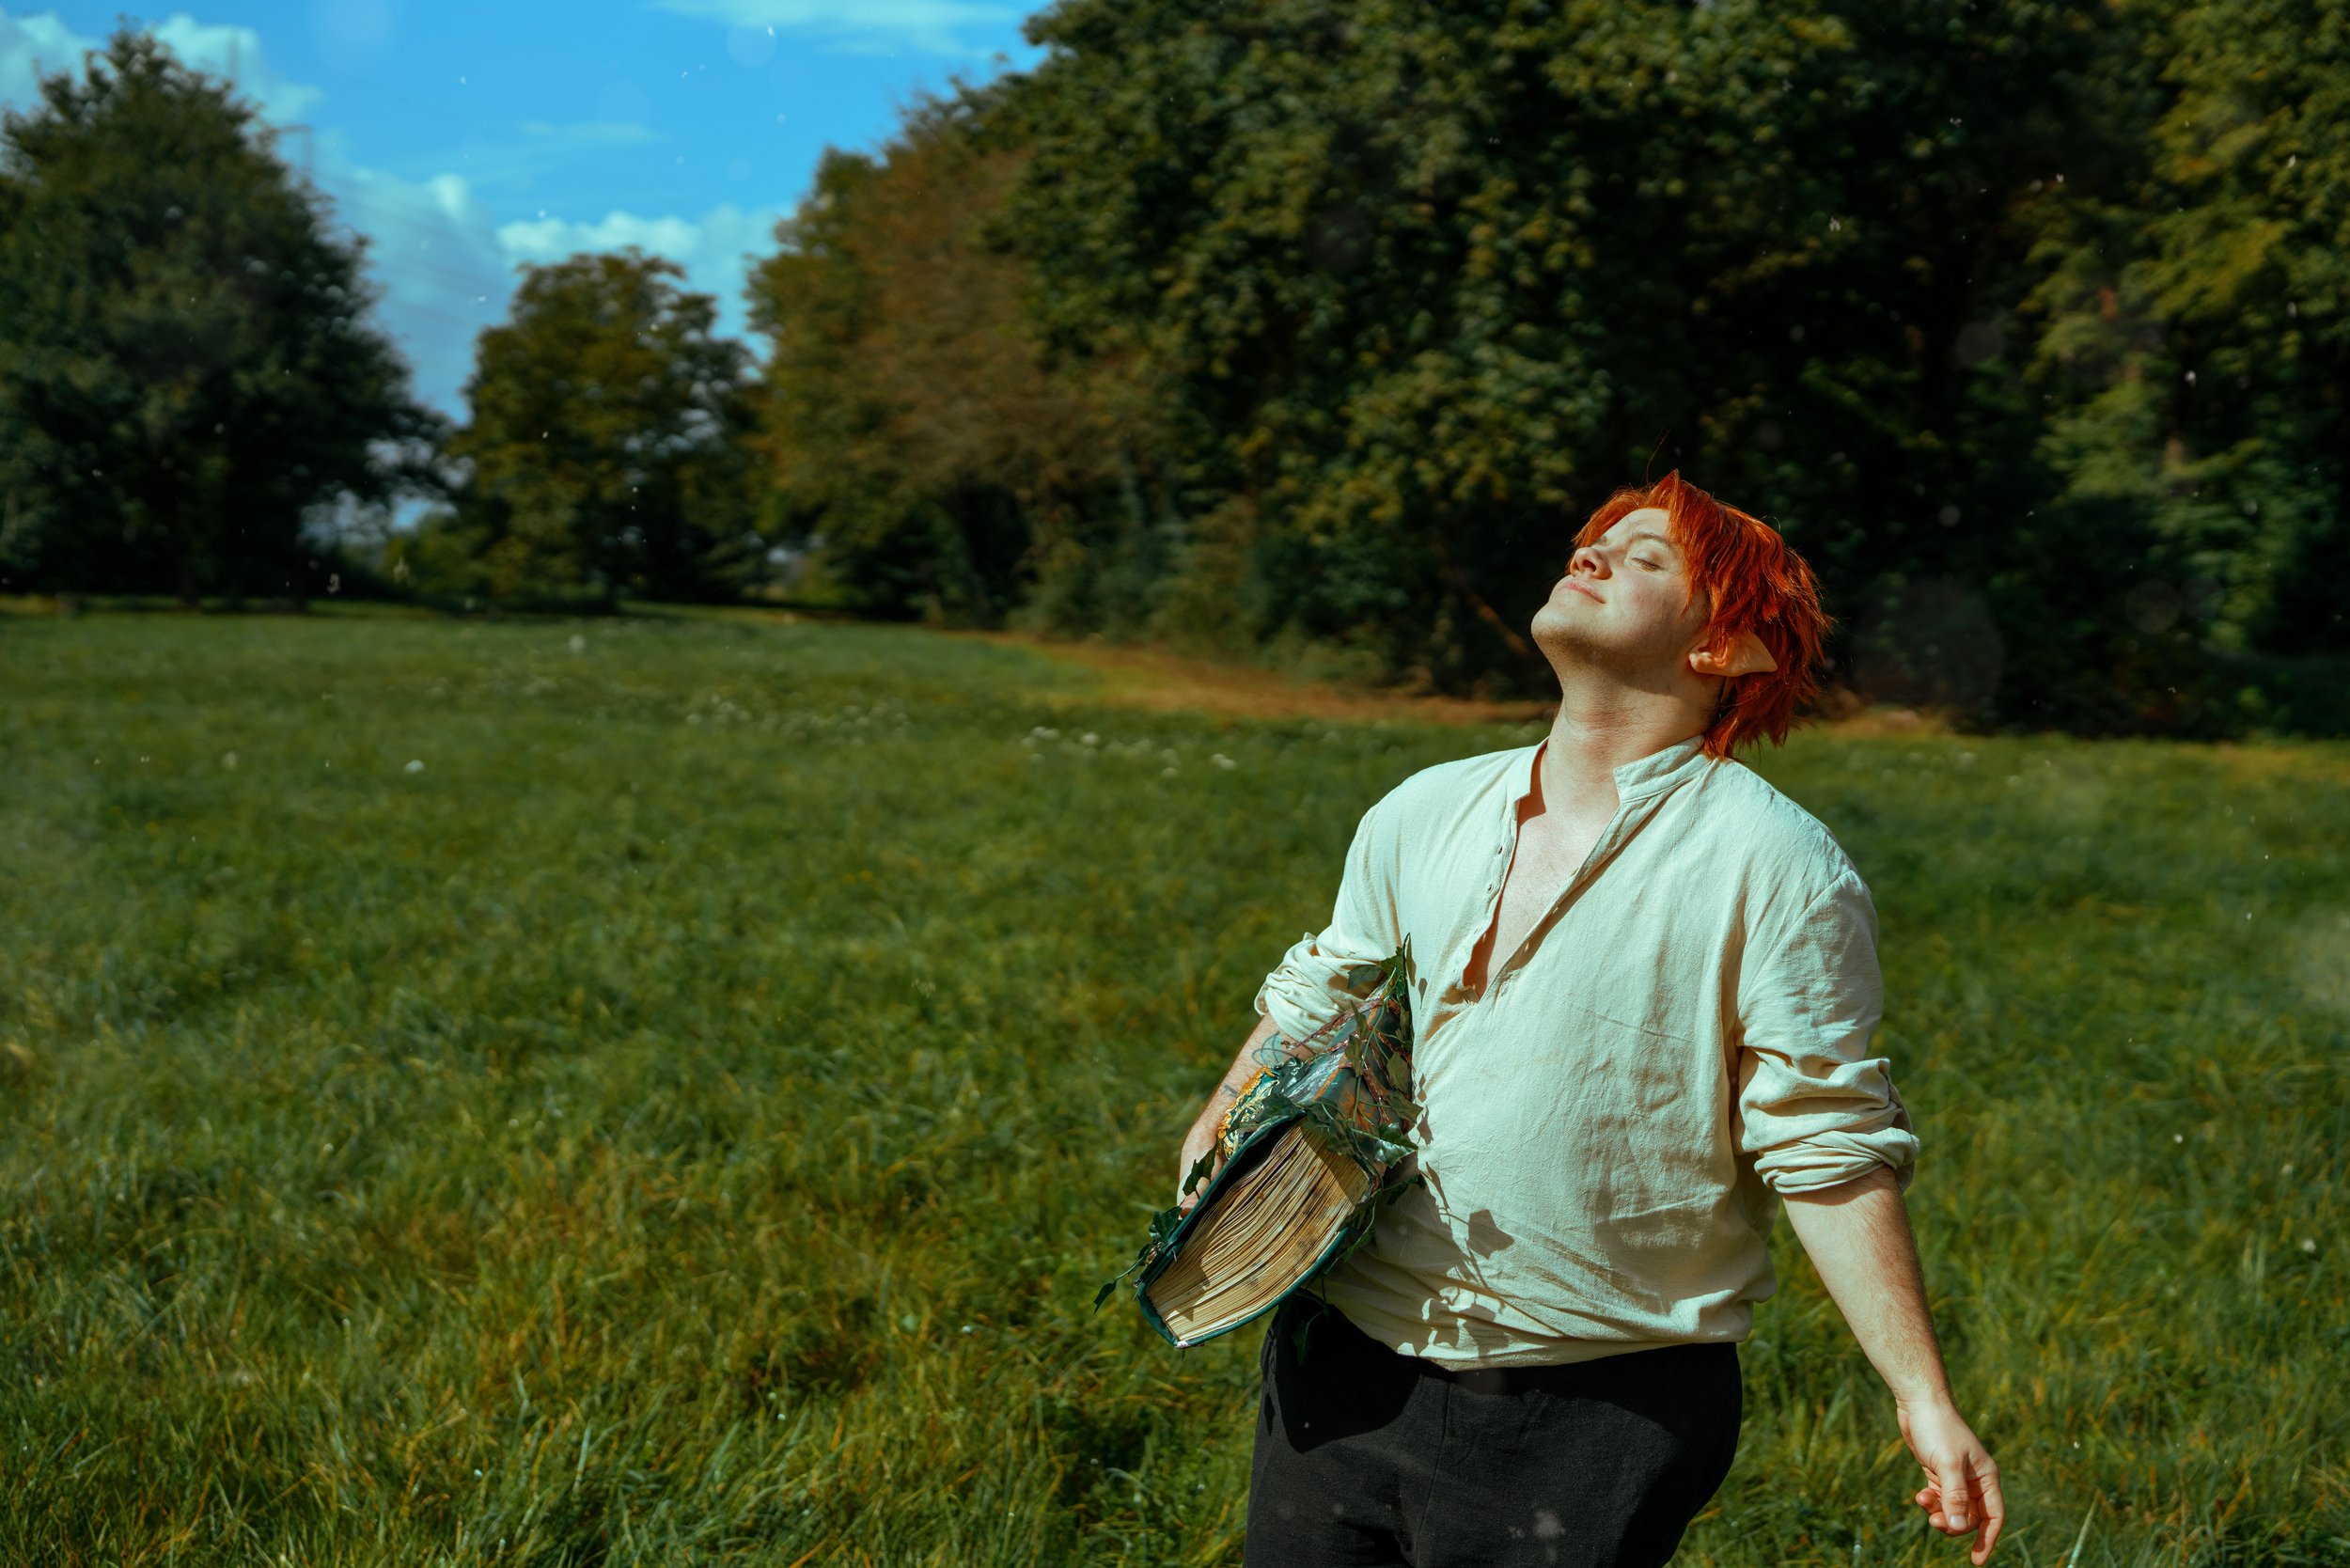
For those familiar with the anime Frieren, you know the main character loves magic and learning new spells. Eldwyn shares that same energy, but with her world: she is fascinated — almost obsessed — with the story of the People of Ananthara, Thal’ithara, and the Dragon Gods. Studying and understanding this history is her passion, making a study room the perfect setting for the shoot.
RAW Footage - Eldwyn - Original Charakter von Wyldheart Studio.
Model: mary_misanthrope
Studio Lighting – Mood, Character, and Creative Freedom
A set only comes alive when the lighting is right — and, of course, when the model brings depth and expression to the character. But before placing the first light, ask yourself a central question:
What mood am I trying to create?
For me, lighting is not just a technical tool — it’s a creative expression. Every set tells a story, and every story deserves its own lighting.
Basics of Studio Lighting
I usually work with multiple light sources. Here are the key components of a classic studio setup:
-
Positioned at 45° to the side and slightly above the subject. Use a softbox or beauty dish for soft shadows and flattering light.
-
Opposite the key light, closer to the camera. Its job is to lighten shadows without removing them completely. Reflectors or weaker lights work best.
-
Behind the subject, slightly to the side. Separates the model from the background and emphasizes contours. Striplights or snoots work great.
-
Shines directly on the backdrop to prevent dullness. Colored gels can add creative flair.
Light Modifiers:
Softbox = soft, flattering light
Beauty Dish = directional light with subtle texture
Striplight = perfect for rim light
Snoot/Grid = focused, dramatic effect
Motto: Simple but effective. Less can often achieve more.


Examples From the Shoot - Part 1
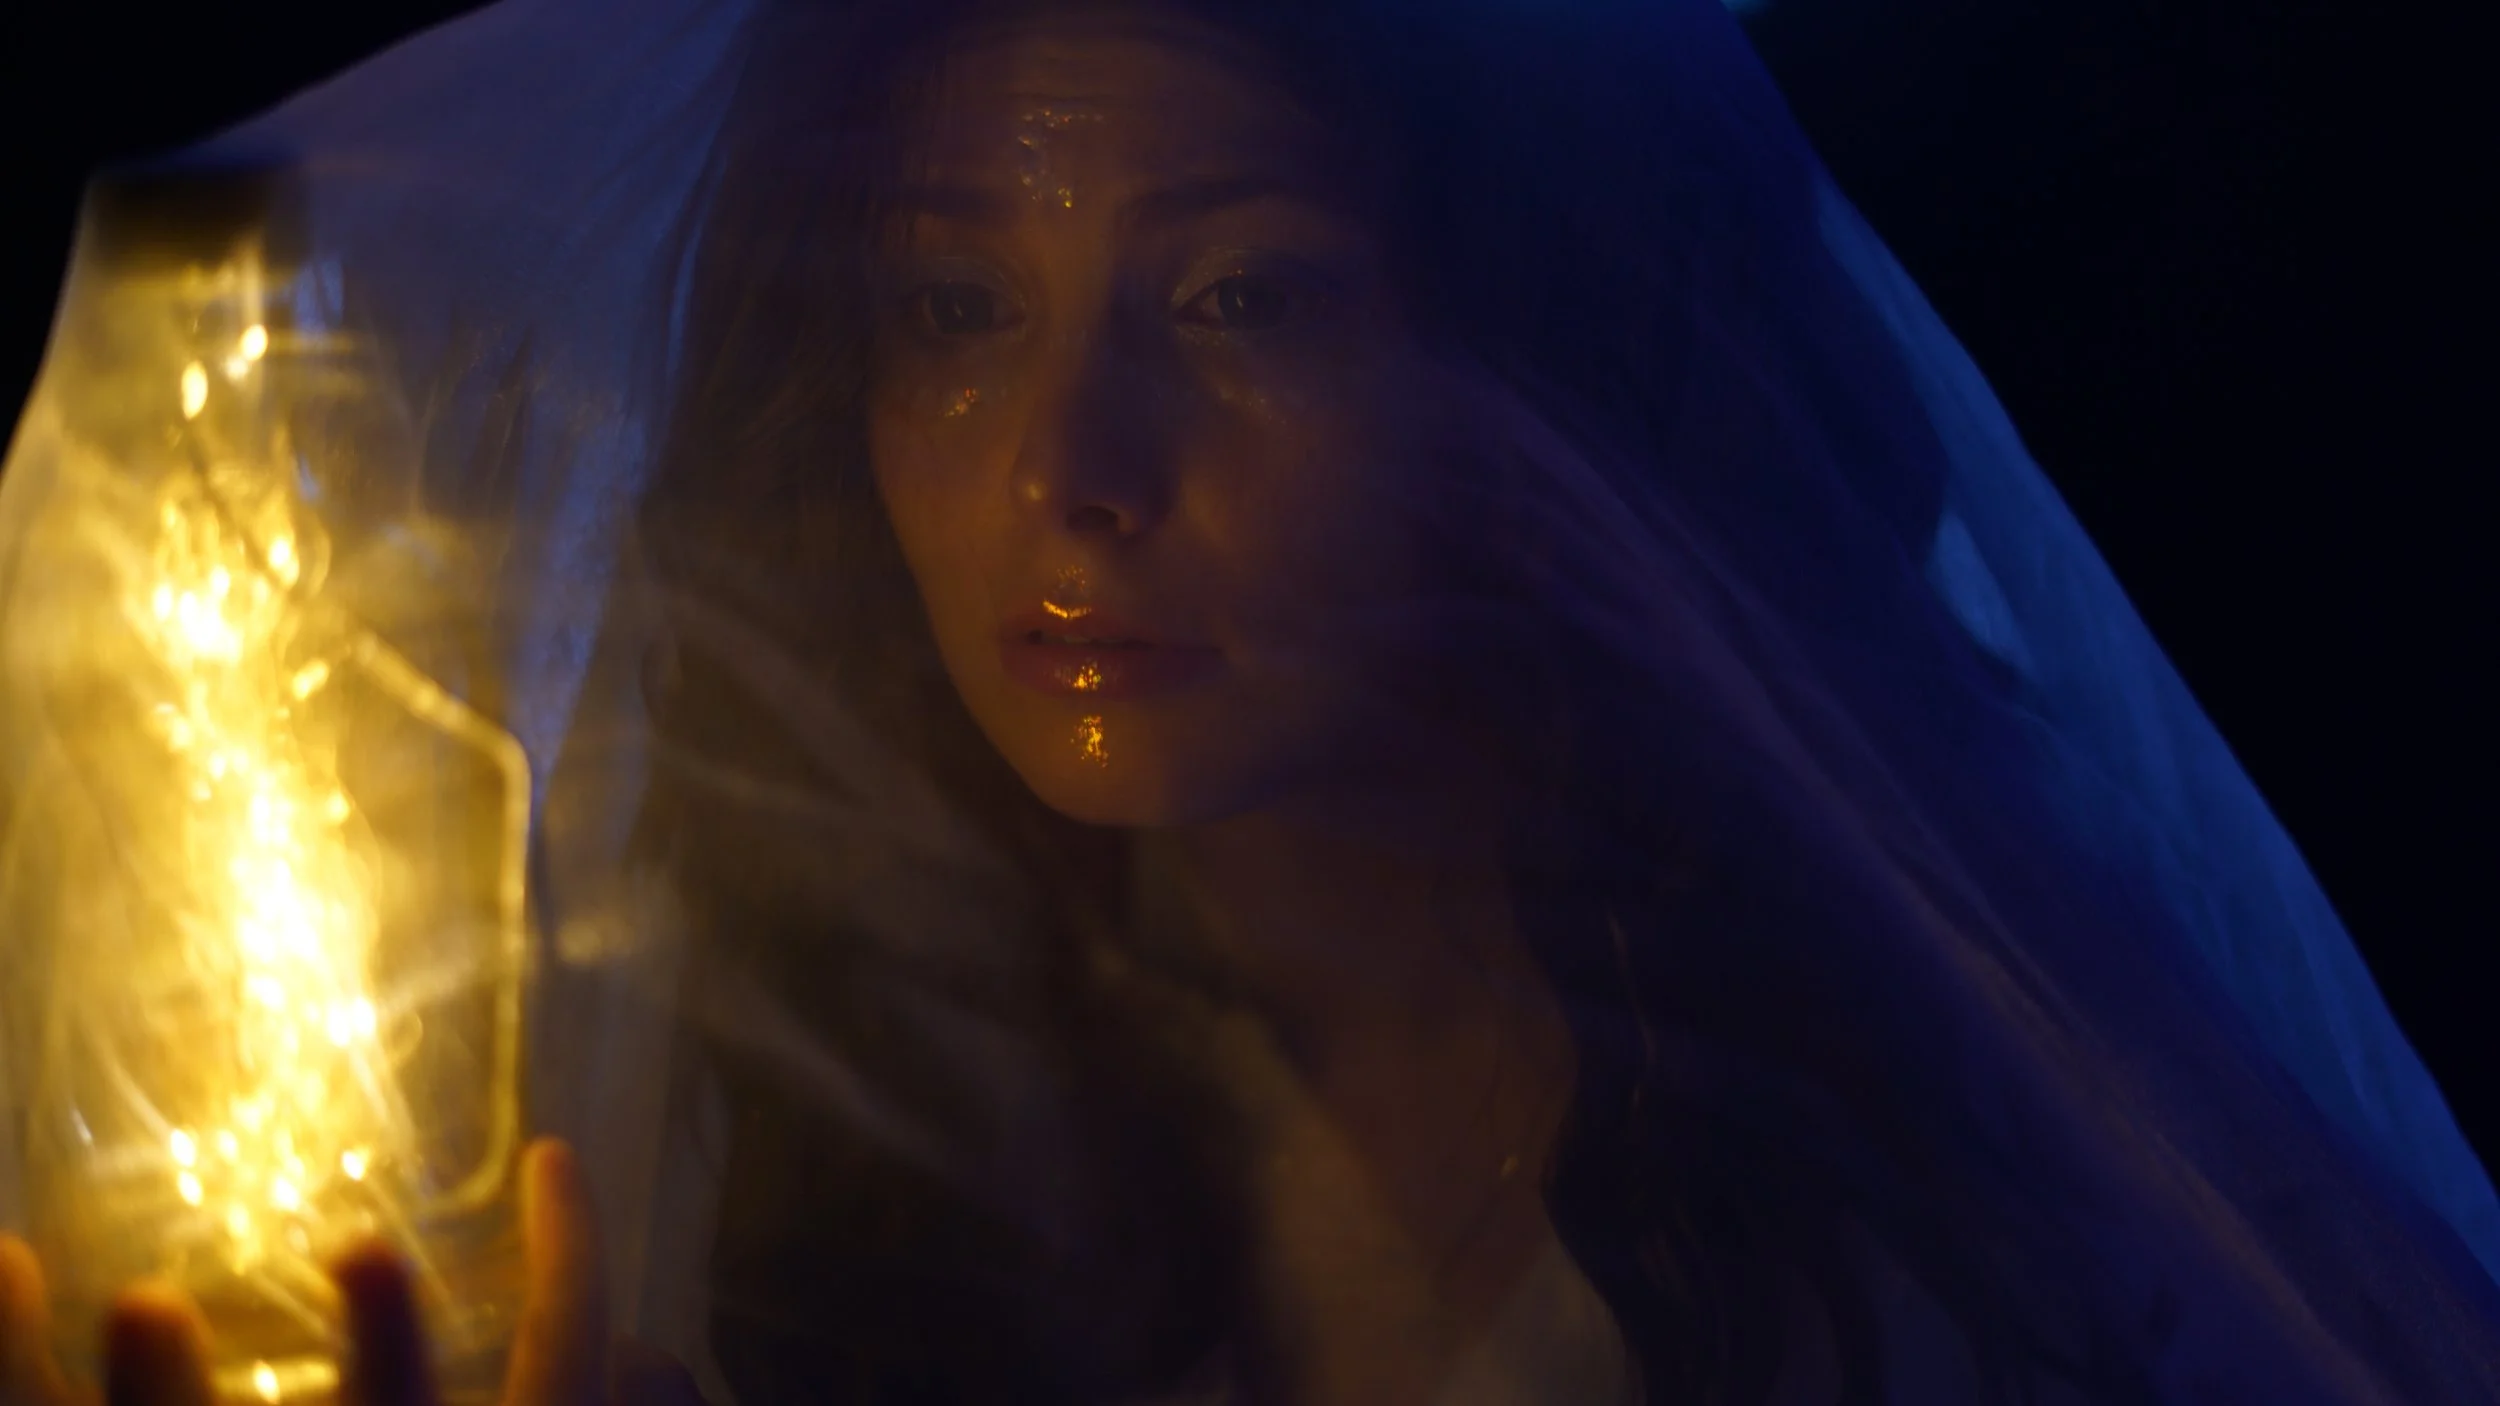
Cool blue tones simulate moonlight streaming through Eldwyn’s balcony.
Warm red/orange key lights mimic torchlight, while UV lights add subtle aesthetic accents.
Set 2:
Minimal lighting for high contrast and tension. Only a key light and subtle rim light were used, emphasizing shadows and mystery.
The key takeaway: rules are guides, not masters. Lighting should feel intuitive and enhance the story. Shadows aren’t mistakes — they give depth, drama, and emotion.
I rarely use direct flash, as it often feels harsh and technical. Instead, I rely on natural or carefully positioned studio lights. Imperfect light is fine — as long as it supports the mood and narrative.


Set 2 Einstellungen für diese Shots: 50mm | ISO 400 | f / 1,8 | 1/60
Practical Tips for Your Studio Shoot
-
Keep enough distance between model, lights, and backdrop. Use sandbags to stabilize stands. Manage cables to prevent accidents.
-
The model should remain the focus. Add props incrementally and ensure they support the story.
-
Matte surfaces soften light; glossy surfaces create highlights. Neutral tones give flexibility, colored props create accents.
-
Use wheels for lights, tables, and backdrops to adapt quickly.
Final Thoughts
Bringing Eldwyn to life wasn’t just about sewing a costume or arranging a set. It was a hands-on way to immerse myself in my fantasy world, deepen my worldbuilding, and make my characters tangible.
Lighting, props, and careful set design are tools to convey mood, personality, and narrative. But the real magic comes from feeling the story, experimenting, and trusting your instincts.
Whether you’re building a fantasy world for a novel, a game, or a cosplay shoot, remember: your world becomes alive when you interact with it physically and emotionally.
Neuste Beiträge